目次
Node.jsで使用する画像変換処理ができるライブラリ。
ImageMagickのようなものと思えばわかりやすい。
sharpは画像処理がものすごく速いので、最近はsharpが使用されるケースが多い。
sharpの公式サイトによるとsharpはImageMagickの約3倍処理が速い。
| Module | Input | Output | Ops/sec | Speed-up |
|---|---|---|---|---|
| jimp | buffer | buffer | 0.84 | 1.0 |
| squoosh-cli | file | file | 1.08 | 1.3 |
| squoosh-lib | buffer | buffer | 1.85 | 2.2 |
| mapnik | buffer | buffer | 3.45 | 4.1 |
| gm | buffer | buffer | 8.60 | 10.2 |
| gm | file | file | 8.66 | 10.3 |
| imagemagick | file | file | 8.79 | 10.5 |
| sharp | stream | stream | 28.90 | 34.4 |
| sharp | file | file | 30.08 | 35.8 |
| sharp | buffer | buffer | 30.42 | 36.2 |
npm install sharp
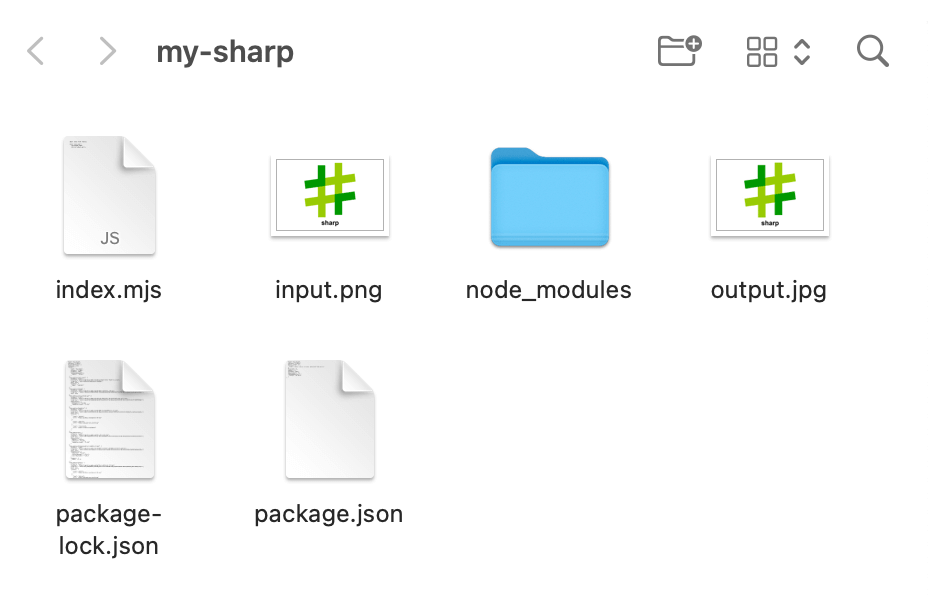
インストールしたら試しにinput.pngとindex.mjsを用意してindex.mjsに以下のコードを書いてnode index.mjsを実行してみてください。
import sharp from 'sharp';

sharp('input.png')
  .resize(600, 400)
  .toFile('output.jpg');
node index.mjs
実行するとinput.pngが600x400にリサイズされ、ファイルがoutput.jpgで書き出されていることが確認できます。
次項以降ではsharpで実行できる画像処理について説明します。
ちなみにsharpが複数あると処理が終わらないうちに次のsharpを実行してエラーになる場合があるので、sharpが複数ある場合はawaitを頭に付けてください。
// awaitを付けた例
await sharp('input.png')
  .withMetadata({ density: 96 })
  .toFile('withMetadata.png');

await sharp('withMetadata.png')
  .metadata()
  .then(metadata => console.log(metadata));
resize
widthとheight
widthやheightを指定して画像をリサイズできる。
先程は.resize(600, 400)でリサイズしたが.resize({width: 600})を指定して縦横比を維持したままリサイズすることもできる。
sharp('input.png')
  .resize({width: 600})
  .toFile('output.jpg');
resizeに第2引数を入れない場合もresize({width: 600})と同様の処理になります。
sharp('input.png')
  .resize(600)
  .toFile('output.png');
※ heightの場合はresize({height: 400})またはresize(null, 400)です。
containで縦横比維持
.resize(600, 600)のように指定すると縦横比を維持せずにリサイズされる。
元画像の縦横比を維持して余った余白は埋めてリサイズしたい場合は「fit: 'contain'」をresizeの第3引数に指定する。
sharp('input.png')
  .resize(600, 600, {
    fit: 'contain'
  })
  .toFile('contain.png');

デフォルトだと「fit: 'contain'」だが、background: '#fff' を指定することで余白の背景色を変更できる。

fitにoutsideで長い方を基準にリサイズ
sharp('input.png')
  .resize({
    width: 500,
    height: 300,
    fit: 'outside'
  })
  .toFile('outside.png');
  // 1200x800 => 500x333 にリサイズ
fitにinsideで短い方を基準にリサイズ
sharp('input.png')
  .resize({
    width: 500,
    height: 300,
    fit: 'inside'
  })
  .toFile('inside.png');
  // 1200x800 => 450x300 にリサイズ
extend
その名の通り画像を拡げる。
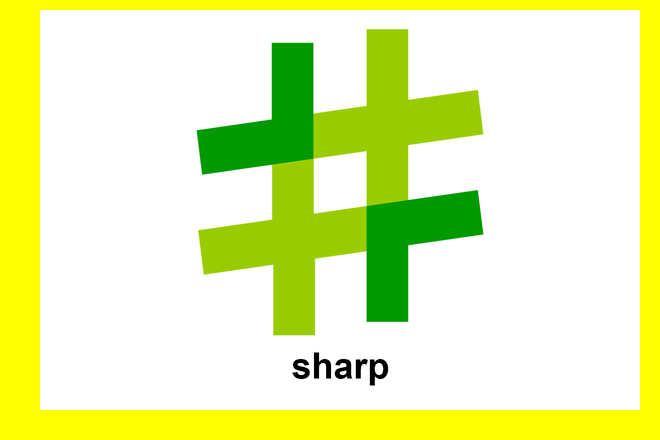
例えば600x400にリサイズして、top: 10px, right: 20px, bottom: 30px, left: 40pxに広げて背景色を#ff0にするには以下のように記述する。
sharp('input.png')
  .resize(600, 400)
  .extend({
    top: 10,
    right: 20,
    bottom: 30,
    left: 40,
    background: '#ff0'
  })
  .toFile('extend.png');
extract
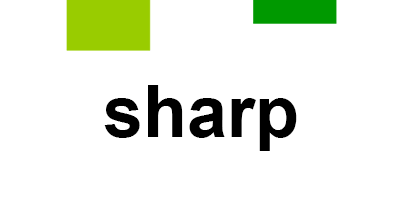
指定した座標を指定したサイズで切り抜く。
例えばinput.pngをtop: 600, left: 400の位置で400x200で切り抜きたい場合は以下のようになる。
sharp('input.png')
  .extract({
    top: 600,
    left: 400,
    width: 400,
    height: 200
  })
  .toFile('extract.png');
trim
左上のピクセルの値を参照して画像をトリミングする。
sharp('input.png')
  .trim()
  .toFile('trim.png');

metadata
画像のmetadataを取得する。
input.pngで実行すると以下のような結果が返る。
sharp('input.png')
  .metadata()
  .then((metadata) => {
    console.log(metadata);
    /* console.log 結果
      {
        format: 'png',
        width: 1200,
        height: 800,
        space: 'srgb',
        channels: 3,
        depth: 'uchar',
        density: 72,
        isProgressive: false,
        paletteBitDepth: 8,
        hasProfile: false,
        hasAlpha: false
      }
    */
  });
画像にExif情報があると「exif: 〜」が含まれるので、以下のようにif文でExif情報を含む画像を検出することができる。
sharp('sample.jpg')
  .metadata()
  .then((metadata) => {
    if (metadata.exif) {
      console.log('画像にExifが含まれています。');
    }
  });
Exifの詳細を確認したい場合はexif-readerのインストールが必要です。
npm install exif-reader
import sharp from 'sharp';
import exif from 'exif-reader';

sharp('sample.jpg')
  .metadata()
  .then((metadata) => {
    console.log(exif(metadata.exif));
  });
stats
画像の各チャンネルのピクセル単位の統計を取得できる。
metadataと比べると使用する機会はあまりないだろう。
sharp('input.png')
  .stats()
  .then((stats) => {
    console.log(stats);
  });
toFile
ファイルの書き出しに利用できる。
thenやcatchで書き出し後のファイルの情報を取得できる。
sharp('input.png')
  .toFile('file.png')
  .then(data => console.log(data))
  .catch(err => console.log(err));
ただし、取得できる情報は以下の6つのみ。
{
  format: 'png',
  width: 1200,
  height: 800,
  channels: 3,
  premultiplied: false,
  size: 20778
}
withMetadata
メタ情報を引き継ぐ。
sharp('input.png')
  .withMetadata()
  .toFile('withMetadata.png')
※ 画像のフォーマットがjpgからpngなどに変更されるとwithMetadata()があってもExifは保持されない。
別のメタ情報の設定もできる。
sharp('input.png')
  .withMetadata({ density: 96 })
  .toFile('withMetadata.png')
jpeg
JGP画像出力時のオプションを設定できる。
主に使用するのはqualityとmozjpegで画質を落としてファイルサイズを小さくしたいときなどに使用する。
sharp('input.png')
  .jpeg({
    quality: 60,
    mozjpeg: true
  })
  .toFile('output.jpg');
png
PNG画像出力時のオプションを設定できる。
JPG同様にqualityで画質を落としてファイルサイズを小さくしたいときなどに使用する。
sharp('input.png')
  .png({
    quality: 60
  })
  .toFile('output.png');
webp
JPG同様にqualityで画質を落としてファイルサイズを小さくしたいときなどに使用する。
※ alphaQualityやlosslessなどもあるがあまり使用されない。
sharp('input.png')
  .webp({ quality: 60 })
  .toFile('output.webp');
gif
JPGなどのようにqualityを変更してファイルサイズを小さくすることはできない。
ファイルサイズを小さくしたい場合はcolorsを指定して減色する。
sharp('input.png')
  .gif({ colors: 128 })
  .toFile('output.gif');
rotate
画像を回転できる。
sharp('input.png')
  .rotate(90)
  .toFile('rotate.png');

blur
画像をぼかす。
sharp('input.png')
  .resize(600)
  .blur(10)
  .toFile('blur.png');

modulate
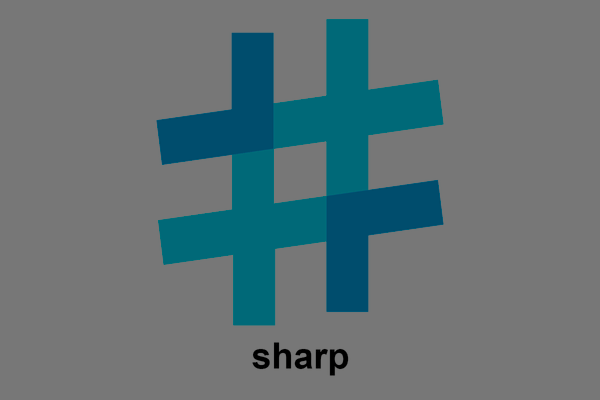
画像にhue, saturation, brightness, lightnessを適用できる。
sharp('input.png')
  .resize(600)
  .modulate({
    hue: 90,
    saturation: 0.5,
    brightness: 0.5,
  })
  .toFile('modulate.png');
grayscale
画像をグレースケールにする。
sharp('input.png')
  .resize(600)
  .grayscale()
  .toFile('grayscale.png');
composite
画像に他の画像を追加する。
配置位置はtopとleftで指定する。(rightとbottomは不可)
sharp('input.png')
  .resize(600)
  .composite([
    {
      input: 'iwbjp.png',
      top: 20,
      left: 20,
    }
  ])
  .toFile('combined.png');
