目次
VitestでReact + TypeScriptのテスト
VitestでReact + TypeScriptのコンポーネントのテストをしようとすると色々な設定があり、設定不足により問題が発生しやすいです。
この記事では少ない工数でVitestでReact + TypeScriptのコンポーネントのテストをする方法を記載しています。
React + TypeScriptの開発環境作成
まず、以下のコマンドでローカルに開発環境を作成します。
npm create vite@latest my-react-test -- --template react-swc-tsコマンド実行後に「Done. Now run:」が表示されたら以下のコマンドで移動してインストールします。
cd my-react-test
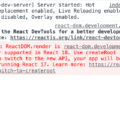
npm installnpm installが完了したら、npm run devでWebページをブラウザで確認できます。
npm run dev
「Vite + React」の部分は<h1>Vite + React</h1>になっています。
あとでApp.test.tsxにh1タグ内のテキストが「Vite + React」になっているかテストするコードを書きますので覚えておいてください。
App.tsxのコードは以下のようになっています。
import { useState } from 'react'
import reactLogo from './assets/react.svg'
import viteLogo from '/vite.svg'
import './App.css'

function App() {
  const [count, setCount] = useState(0)

  return (
    <>
      <!-- 中略 -->
      <h1>Vite + React</h1>
      <!-- 中略 -->
    </>
  )
}

export default App
テストに必要なものを作成&設定する
テストに必要なvitestや@testing-libraryも以下のコマンドでインストールしておきます。
npm i -D vitest happy-dom @testing-library/react @testing-library/jest-domsrc配下に「__test__」ディレクトリとApp.test.tsxファイルを作成します。
ルートディレクトリにsetupTests.tsも作成しておきます。
mkdir src/__test__
touch src/__test__/App.test.tsx
touch setupTests.ts
setupTests.tsの中に「import '@testing-library/jest-dom/vitest'」を記載します。
// setupTests.ts
import '@testing-library/jest-dom/vitest'
tsconfig.jsonに「"types": ["@testing-library/jest-dom"]」を追記します。
{
  "compilerOptions": {
    "target": "ES2020",
    "useDefineForClassFields": true,
    "lib": ["ES2020", "DOM", "DOM.Iterable"],
    "module": "ESNext",
    "skipLibCheck": true,
    "types": ["@testing-library/jest-dom"],
    /* 中略 */
  }
}
vite.config.tsにテストをするための設定を追加します。
// vite.config.ts
/// <reference types="vitest/config" />
import { defineConfig } from 'vite'
import react from '@vitejs/plugin-react-swc'

// https://vitejs.dev/config/
export default defineConfig({
  plugins: [react()],
  test: {
    globals: true,
    environment: 'happy-dom',
    setupFiles: ['./setupTests.ts'],
  },
})
ここまでの設定が完了したら、App.test.tsxにテストコードを書いてテストができるようになります。
例えばh1タグ内のテキストが「Vite + React」になっているかテストするコードは以下のようになります。
// App.test.tsx
import { describe, expect, test } from 'vitest'
import { render, screen } from '@testing-library/react'
import App from '../App'

describe('App h1 text', () => {
  test('renders', () => {
    render(<App />)
    const headingElement = screen.getByRole('heading', { level: 1, name: 'Vite + React' })
    expect(headingElement).toBeInTheDocument()
  })
})
ターミナルで「vitest」コマンドを実行するとテストの処理が実行されます。
$ vitest

 DEV  v1.6.0 /Users/i/my-react-test

 ✓ src/__test__/App.test.tsx (1)
   ✓ App h1 text (1)
     ✓ renders

 Test Files  1 passed (1)
      Tests  1 passed (1)
   Start at  19:46:21
   Duration  635ms (transform 77ms, setup 128ms, collect 86ms, tests 30ms, environment 229ms, prepare 63ms)
「vitest」ではなく「npm run test」で実行したい場合は、package.jsonに以下を追記します。
{
  "scripts": {
    "test": "vitest",
    "test:ui": "vitest --ui",
    "test:coverage": "vitest --coverage"
  }
}
「vitest --ui」はテスト結果をブラウザでUI表示するためのコマンドです。

「vitest --coverage」はテスト結果だけでなく、Coverage reportを表示させるためのコマンドです。
$ vitest --coverage

 DEV  v1.6.0 /Users/i/my-react-test
      Coverage enabled with v8

 ✓ src/__test__/App.test.tsx (1)
   ✓ App h1 text (1)
     ✓ renders

 Test Files  1 passed (1)
      Tests  1 passed (1)
   Start at  19:46:21
   Duration  635ms (transform 77ms, setup 128ms, collect 86ms, tests 30ms, environment 229ms, prepare 63ms)

 % Coverage report from v8
----------|---------|----------|---------|---------|-------------------
File      | % Stmts | % Branch | % Funcs | % Lines | Uncovered Line #s
----------|---------|----------|---------|---------|-------------------
All files |   77.77 |       50 |   33.33 |   77.77 |
 App.tsx  |     100 |      100 |      50 |     100 |
 main.tsx |       0 |        0 |       0 |       0 | 1-10
----------|---------|----------|---------|---------|-------------------
App.tsxを修正してFAILにしてみる
App.tsxの「Vite + React」を「Vite+React」に修正してテストを実行すると、テキストが一致しないため「FAIL」になります。
$ vitest

 DEV  v1.6.0 /Users/i/my-react-test

 ❯ src/__test__/App.test.tsx (1)
   ❯ App h1 text (1)
     × renders

⎯⎯⎯⎯⎯⎯⎯⎯⎯⎯⎯⎯⎯⎯⎯⎯⎯⎯⎯⎯⎯⎯⎯⎯⎯⎯⎯⎯⎯⎯⎯⎯⎯⎯⎯⎯⎯⎯⎯⎯⎯⎯⎯ Failed Tests 1 ⎯⎯⎯⎯⎯⎯⎯⎯⎯⎯⎯⎯⎯⎯⎯⎯⎯⎯⎯⎯⎯⎯⎯⎯⎯⎯⎯⎯⎯⎯⎯⎯⎯⎯⎯⎯⎯⎯⎯⎯⎯⎯⎯

 FAIL  src/__test__/App.test.tsx > App h1 text > renders
TestingLibraryElementError: Unable to find an accessible element with the role "heading" and name "Vite + React"
h1タグをh2タグなどに変更しても、タグが一致しないのでFAILになります。
クリックでカウントが増えるかテストする
App.tsxには「count is 0」をクリックすると、「count is 1」に増加するボタンがあります。
App.test.tsxにクリックした際に1増加するかテストしたい場合は、@testing-library/reactからクリックなどのDOMイベントを発火させる「fireEvent」の関数をimportします。
import { render, screen, fireEvent } from '@testing-library/react'次にh1タグのテキストのテストのときのように、screen.getByRoleを使ってボタンの要素を取得します。
import { describe, expect, test } from 'vitest'
import { render, screen, fireEvent } from '@testing-library/react'
import App from '../App'

describe('App button', () => {
  test('increase count by 1', () => {
    render(<App />)
    const buttonElement = screen.getByRole('button', { name: 'count is 0' })
  })
})
fireEventでボタンの要素(buttonElement)をクリックする処理を追加して、expectとtoHaveTextContentでbuttonElementが「count is 1」になるかテストします。
import { describe, expect, test } from 'vitest'
import { render, screen, fireEvent } from '@testing-library/react'
import App from '../App'

describe('App button', () => {
  test('increase count by 1', () => {
    render(<App />)
    const buttonElement = screen.getByRole('button', { name: 'count is 0' })
    fireEvent.click(buttonElement)
    expect(buttonElement).toHaveTextContent('count is 1')
  })
})
こちらのテストもvitestコマンドで実行するとテストをPASSすることが確認できます。
$ vitest

 DEV  v1.6.0 /Users/i/my-react-test

 ✓ src/__test__/App.test.tsx (1)
   ✓ App button (1)
     ✓ increase count by 1

 Test Files  1 passed (1)
      Tests  1 passed (1)
   Start at  22:23:02
   Duration  568ms (transform 75ms, setup 117ms, collect 78ms, tests 32ms, environment 228ms, prepare 48ms)
もしクリックを1回ではなく10回にしたい場合は、for文を使用して以下のようになります。
import { describe, expect, test } from 'vitest'
import { render, screen, fireEvent } from '@testing-library/react'
import App from '../App'

describe('App button', () => {
  test('increase count by 10', () => {
    render(<App />)
    const buttonElement = screen.getByRole('button', { name: 'count is 0' })
    for (let i = 0; i < 10; i++) {
      fireEvent.click(buttonElement)
    }
    expect(buttonElement).toHaveTextContent('count is 10')
  })
})
fireEventはclick以外にもchangeやinputイベントなども使用可能です。
※ event-map.jsに記載されているイベントがfireEventで使用可能です。
screen.getByTestIdで指定する方法
screen.getByRoleではなくscreen.getByTestIdでidを指定して要素を取得する方法もあります。
まず、以下のようにdata-testid属性と値を追加します。
// App.tsx
<button onClick={() => setCount((count) => count + 1)} data-testid="buttonCount">
  count is {count}
</button>
あとはscreen.getByTestIdで取得する要素を指定して、同じようにfireEvent.clickでイベントを発火して、expect(buttonCount).toHaveTextContent('count is 1')でテキストに変化があるかテストします。
import { describe, expect, test } from 'vitest'
import { render, screen, fireEvent } from '@testing-library/react'
import App from '../App'

describe('App button', () => {
  test('increase count by 1', () => {
    render(<App />)
    const buttonCount = screen.getByTestId('buttonCount')
    fireEvent.click(buttonCount)
    expect(buttonCount).toHaveTextContent('count is 1')
  })
})
screen.getByRoleで指定できない要素の場合は、screen.getByTestIdを使用すると良いでしょう。
Vitest React + TypeScript Sample