FirebaseのAuthenticationとは
Googleが提供するユーザー認証を簡単に実装できるサービスです。
例えば「ログイン」のボタンを設置してログインした場合は「[ユーザー名]でログイン中」、「ログアウト」のボタンを押した場合は「ログアウト中」と表示する処理を簡単に実装できます。
この記事ではSvelteを使用したFirebaseのAuthenticationの使い方について解説しています。
Svelteをインストール
まず、以下のコマンドでVite + Svelteをインストールして作業環境を作成します。
npm create vite@latest svelte-auth -- --template svelte
cd svelte-auth
npm install
HTMLのコーディング
まずApp.svelteを以下のようにします。
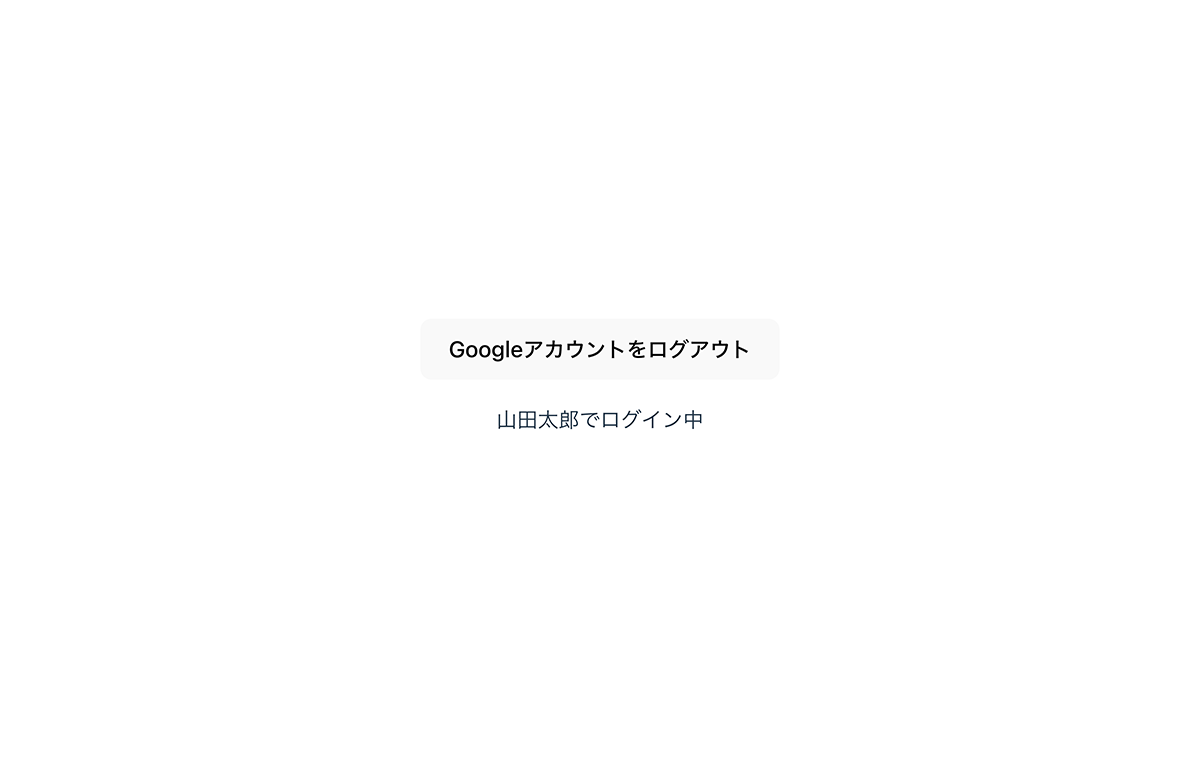
ログインボタンを押すと「{userName}でログイン中」と表示されるサンプルを作成します。
<script>
let isLogin = false
let userName
</script>

<main>
  {#if isLogin}
    <button on:click={() => isLogin = false}>
      Googleアカウントをログアウト
    </button>
    <p>{userName}でログイン中</p>
  {:else}
    <button on:click={() => isLogin = true}>
      Googleアカウントでログイン
    </button>
  {/if}
</main>
Firebaseのプロジェクトを作成
FirebaseのAuthenticationを使用するために以下のURLにアクセスしてFirebaseのプロジェクトを作成します。
https://console.firebase.google.com/u/0/?hl=ja
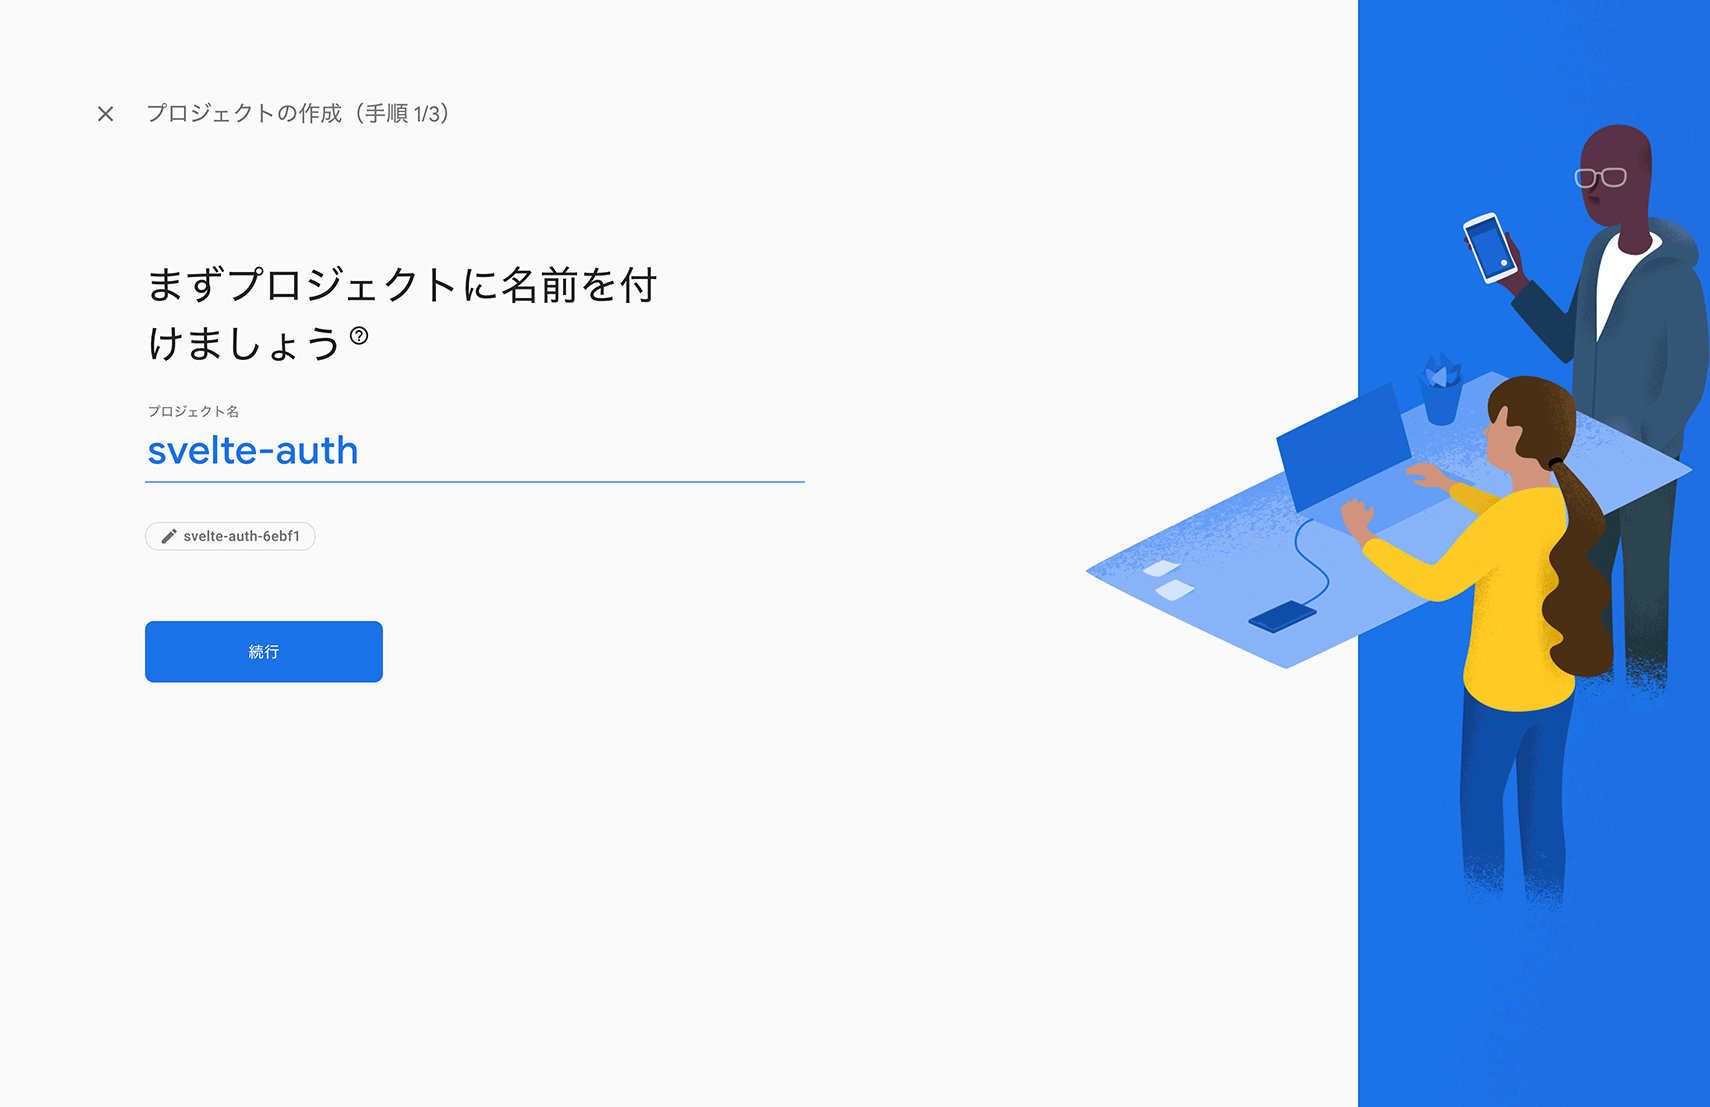
プロジェクトの名前はsvelte-authにします。
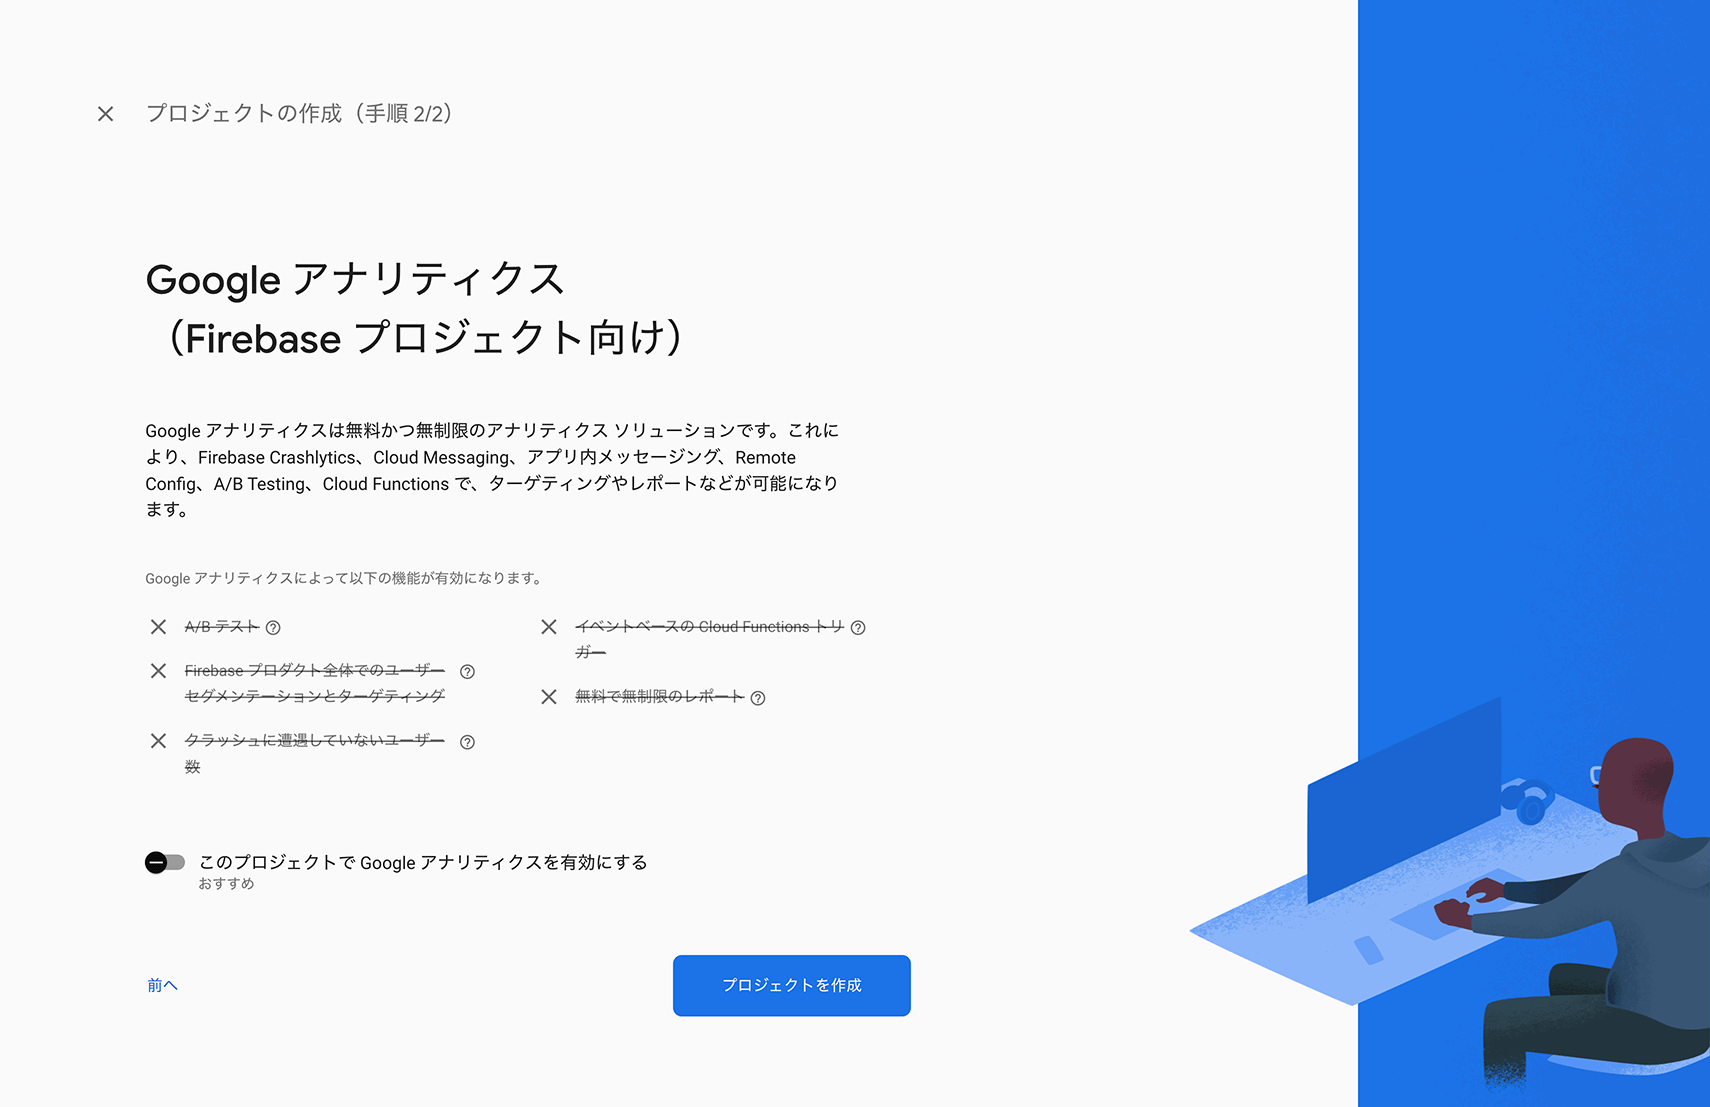
Googleアナリティクスは使わないので無効にして「プロジェクトを作成」を押します。
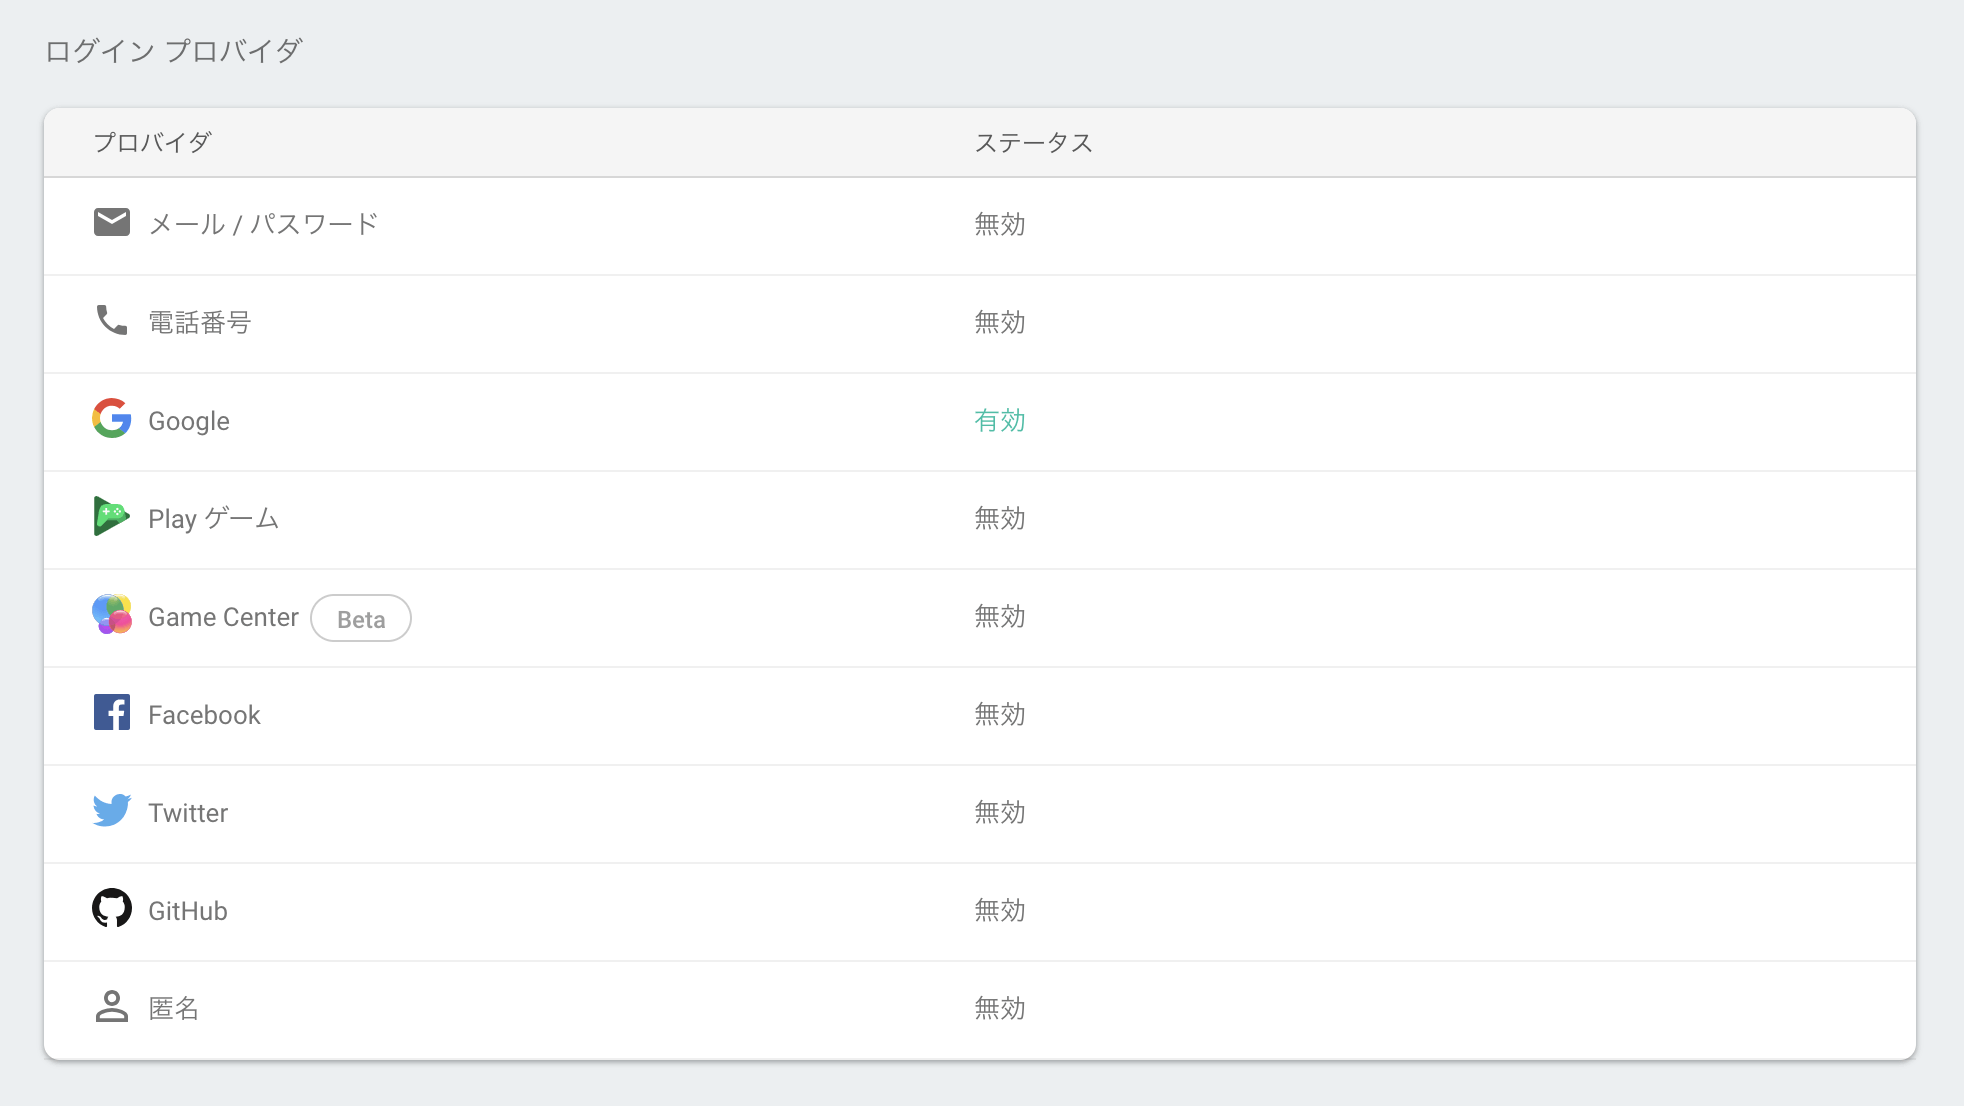
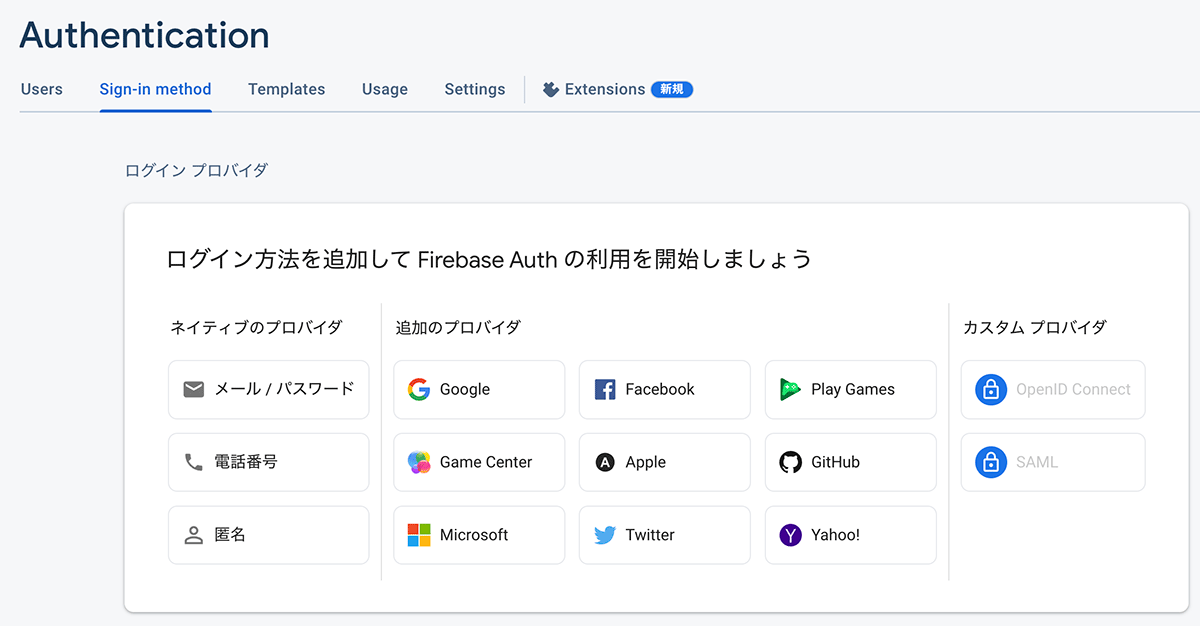
プロジェクトを作成したらAuthenticationのページに移動して、追加のプロバイダからGoogleを選択します。
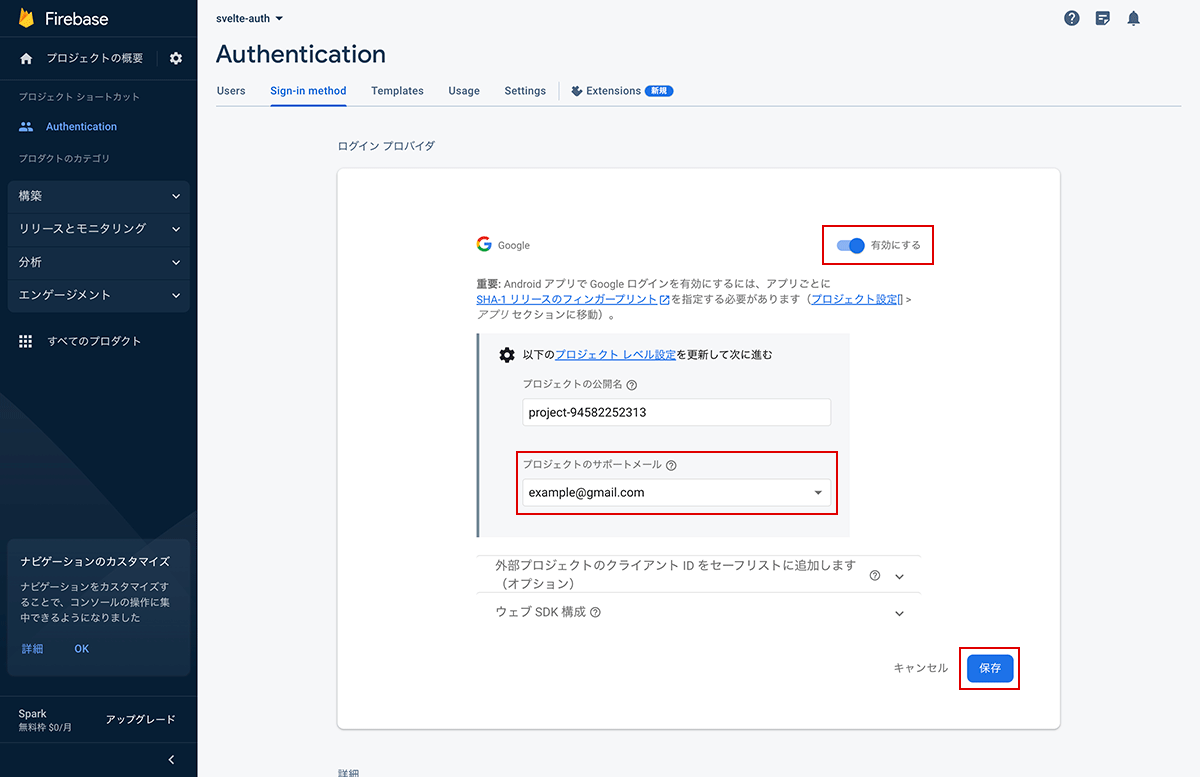
ログイン プロバイダのGoogleを「有効にする」をオンにして、プロジェクトのサポートメールを選択したあと保存を押します。
以上の設定が完了すれば、AuthenticationのGoogleの有効化は完了なので、次にプロジェクトの概要からウェブのアプリの追加を行います。
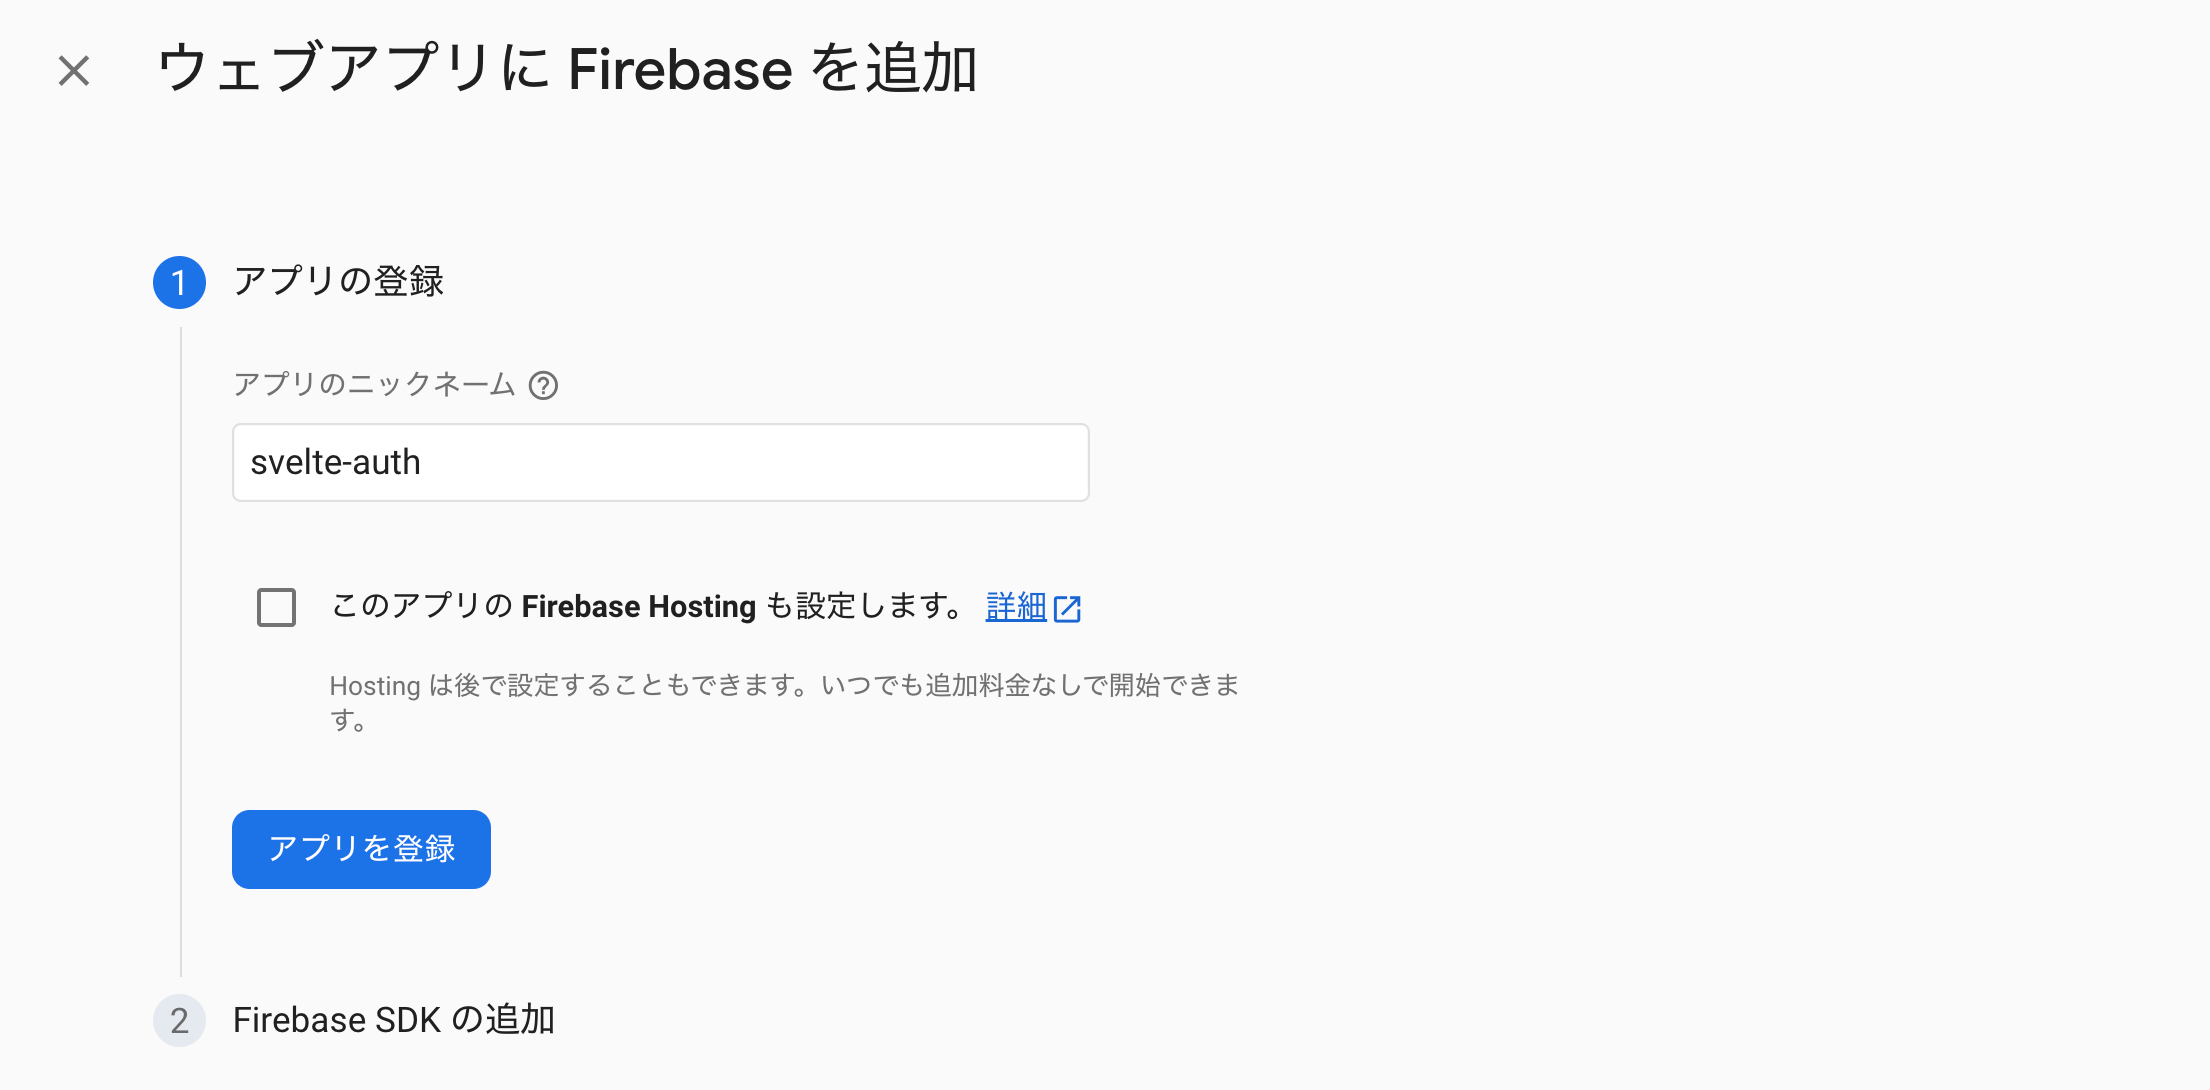
アプリのニックネームに「svelte-auth」を入力して「アプリを登録」を押します。
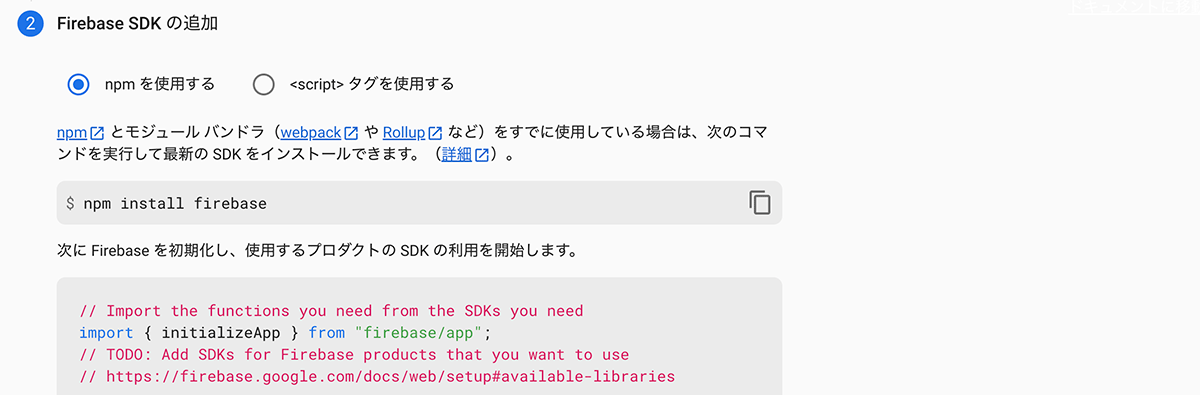
Firebase SDKの追加にあるコマンドでfirebaseをインストールして、表示されているAPIキーなどをコピーします。
あとは最初にコーディングしたApp.svelteを以下のように修正すればGoogleアカウントを使用したログイン・ログアウトの機能を実装できます。
<script>
import { initializeApp } from 'firebase/app'
import { getAuth, signInWithPopup, GoogleAuthProvider, onAuthStateChanged, signOut } from 'firebase/auth'

const firebaseConfig = {
  apiKey: '[Firebase SDKの追加でコピーしたテキスト]',
  authDomain: '[Firebase SDKの追加でコピーしたテキスト]',
  projectId: '[Firebase SDKの追加でコピーしたテキスト]',
  storageBucket: '[Firebase SDKの追加でコピーしたテキスト]',
  messagingSenderId: '[Firebase SDKの追加でコピーしたテキスト]',
  appId: '[Firebase SDKの追加でコピーしたテキスト]'
}
const app = initializeApp(firebaseConfig)
const provider = new GoogleAuthProvider()
const auth = getAuth()
let isLogin = false
let isLoading = true
let userName

function handleLogin() {
  signInWithPopup(auth, provider)
    .then((result) => {
      userName = result.user.displayName
      isLogin = true
    })
    .catch((error) => {
      console.error(error.message)
    })
}

function handleLogout() {
  signOut(auth)
    .then(() => {
      isLogin = false
    })
    .catch((error) => {
      console.error(error.message)
    })
}

onAuthStateChanged(auth, (user) => {
  if (user) {
    isLogin = true
    userName = user.displayName
  } else {
    isLogin = false
  }
  isLoading = false
})
</script>

<main>
  {#if !isLoading}
    {#if isLogin}
      <button on:click={handleLogout}>
        Googleアカウントをログアウト
      </button>
      <p>{userName}でログイン中</p>
    {:else}
      <button on:click={handleLogin}>
        Googleアカウントでログイン
      </button>
    {/if}
  {/if}
</main>
FirebaseのAuthentication使用時の注意点
FirebaseのAuthenticationはJavaScriptでログイン状態を判定しているので、何も対策をしていないとログイン状態でもページを開いた際に読み込み完了までの一瞬だけログアウトのテキストが表示されてしまいます。
前述のコードではこれを防ぐためにisLoading変数を用意しておいて、読み込み完了するまで「{#if !isLoading}」で判定して該当箇所を非表示にしています。
※ onAuthStateChangedでログイン状態が確定してから表示するようにしています。
また、ログイン状態のときのみFirestoreを利用する目的でAuthenticationを使用する場合は、Firestore側のルールでアカウントを制限しないと誰でもログインすれば利用可能になってしまうので注意が必要です。
rules_version = '2';

service cloud.firestore {
  match /databases/{database}/documents {
    match /{document=**} {
      allow read, write: if request.auth != null &&
        request.auth.token.email == 'example@gmail.com';
    }
  }
}