Next.jsを静的エクスポートする方法
Webサイト制作時にNext.jsで制作したWebページをHTMLの静的アセットを提供できるWebサーバーにアップロードしたいことがあります。
検索エンジンなどでNext.jsを静的エクスポートする方法を調べると、「next export」コマンドでできると表示されることがあります。
しかし、最新のNext.jsでは「next export」コマンドは使用できません。
バージョン13.3以降のNext.jsで静的エクスポートするには、next.config.mjs (next.config.js) の設定ファイルに「output: 'export'」を追記して、「npm run build」でビルドします。
/** @type {import('next').NextConfig} */
const nextConfig = {
  output: 'export',
};

export default nextConfig;npm run build「output: 'export'」の設定で「npm run build」を実行すると、ローカルのルートディレクトリにoutディレクトリが作成されて、その中にHTMLファイルなどが書き出されます。
「out」ディレクトリではなく、「dist」のような任意のディレクトリ名で書き出す場合は、distDirでディレクトリ名を指定します。
/** @type {import('next').NextConfig} */
const nextConfig = {
  distDir: 'dist',
  output: 'export',
};

export default nextConfig;
アップロード先がルートディレクトリでない場合
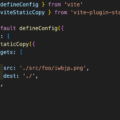
ルートディレクトリではなく、example.com/foo/bar/ のようなディレクトリにアップロードする場合は、next.config.mjs に「basePath」を追加してパスを書けば、パス変更できます。
distDirはbasePathの最後のディレクトリ名にしてください。
/** @type {import('next').NextConfig} */
const nextConfig = {
  basePath: '/ss/nextjs-static-export-output-npm-run-build',
  distDir: 'nextjs-static-export-output-npm-run-build',
  output: 'export',
};

export default nextConfig;
画像のsrcのディレクトリのパスを変更する
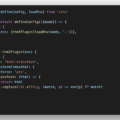
デフォルトのpage.tsxの画像のパスは「src="/vercel.svg"」のようになっているため、このままだとビルドをしても画像を読み込めません。
<Image
  src="vercel.svg"
  alt="Vercel Logo"
  className={styles.vercelLogo}
  width={100}
  height={24}
  priority
/>
画像を読み込むにはnext.config.mjsに別途パスを設定して、page.tsxで読み込んでsrcに追加します。
/** @type {import('next').NextConfig} */
const nextConfig = {
  basePath: '/s/nextjs-static-export-output-npm-run-build',
  distDir: 'nextjs-static-export-output-npm-run-build',
  output: 'export',
  env: {
    BASE_PATH: '/s/nextjs-static-export-output-npm-run-build',
  },
};

export default nextConfig;
const basePath = process.env.BASE_PATH;

<!-- 中略 -->

<Image
  src={`${basePath}/vercel.svg`}
  alt="Vercel Logo"
  className={styles.vercelLogo}
  width={100}
  height={24}
  priority
/>
ビルド後にアップロードして確認する
以上の設定で「npm run build」を実行して、生成されたディレクトリを以下のURL先にアップロードすると、Next.jsで作成されたWebページが確認できます。
https://iwb.jp/s/nextjs-static-export-output-npm-run-build/